Background
When creating proper documentation for any application it is vital to be thorough. So when I was tasked with creating proper UX documentation for skilled trade learning simulations, I had to start with the bare necessities -- THE TOOLS.
Tools might be overlooked because we already know how to use them in the real world. Sometimes the simplest of tools isn't easily transferred to a desktop application, or VR.

How To Activate A Tool
Before documenting the UX for all the tools a user may interact with in our sims, let’s take a moment to explain how the user activates a tool. For this application there are two different mediums to play it on: desktop (keyboard & mouse) and VR.
Desktop Screenspace Solution(s):
There are two ways to activate tools on the Desktop app... (1) Auto-activation and (2) Tool Inventory Popup.
Option 1: Auto-Activation
When the user progresses through the steps the tool necessary for that step will automatically be activated. The user will not have to grab the tool from the Toolbox. This option would only be available in Training Mode (note: Training Mode is a beginner version of the simulation.)
Option 2: Tool Inventory Popup
In the Bottom Bar there is a Toolbox Icon. The user interacts with the Toolbox Icon and is presented with the Toolbox Popup Window. To activate/deactivate a tool, the user interacts with the image of the tool. The tool will become selected and active. The Popup Window remains open until the user minimizes it. The option would only be available in Challenge Mode (note: Challenge Mode is an advanced version of the simulation.)
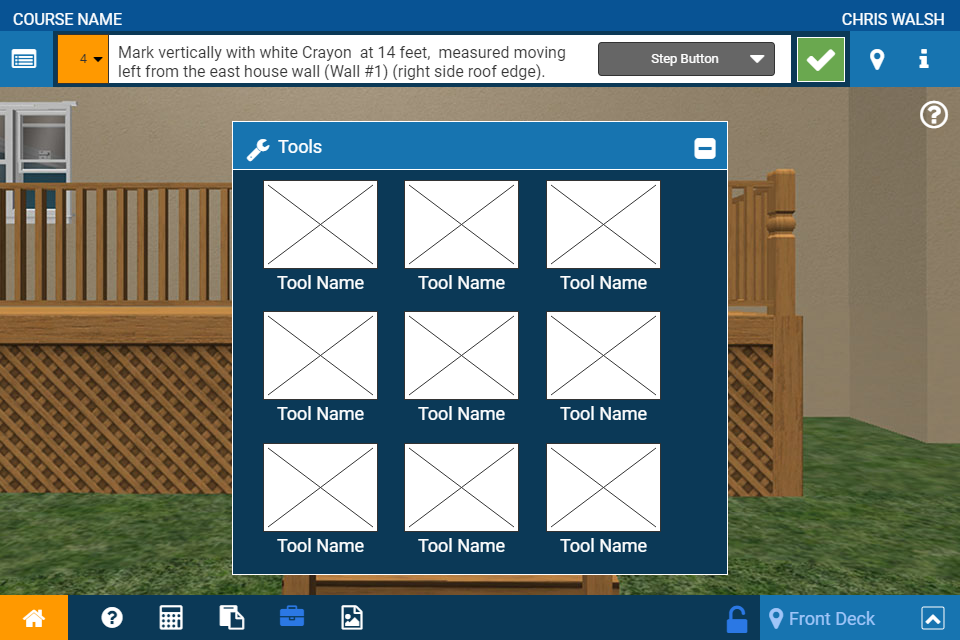
Tool Inventory Popup, Desktop Screenspace
VR Solution:
Tool Inventory Popup
In VR, it is not wise to have tools automatically appear in the user's 'hands'. We opted to remove the auto-activate, but the Tool Inventory Popup was still in play. The only thing that needed to be reworked was how the user opens the TI Popup.
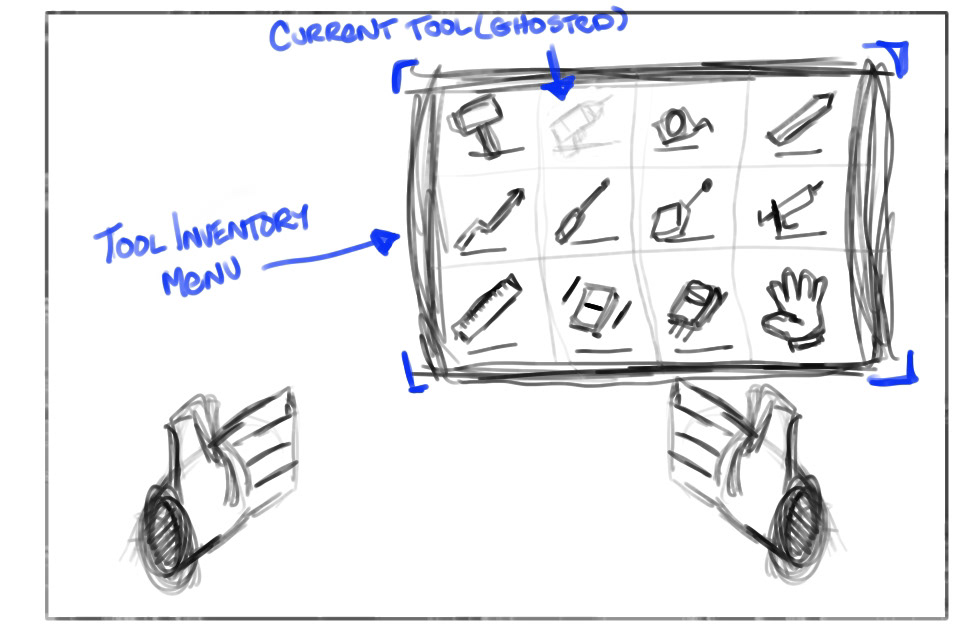
1) To access the Tool Inventory Popup, the user would simply need to press down on the D-Pad (HTC Vive). The Popup will appear.
2) To grab a Tool, the user would simply need to move their 'hand' over the tool they want and release the D-Pad.

How to Use a Tool
Now that we have gone over the quick version of how to access tools. There needs to be proper documentation about how to use each tool for the Desktop App and VR.
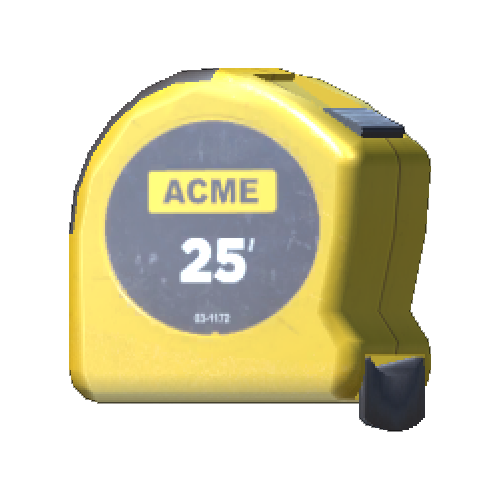
Here is a sample of one tool... the Tape Measure.
Description
•The Measuring Tape is a tool used to measuring long distances.
•The hooked tab is either held by someone or kept in place by other means and the user pulls the housing to the desired location.
•The interaction can be done in reverse wherein the user hold the housing in place and they, or someone else, pulls the hooked tab to the desired location.
Tool Type:
•‘Click/Touch/Trigger AND Hold’ at Location A THEN Release at Location B.
Keyboard & Mouse
•The user left-click/holds a starting location, pinning the hooked tab to that location.
•The housing is directly connected to the user’s mouse cursor.
•The tape measure is displayed between the two points (hooked tab/starting location and housing/mouse cursor).
•The distance is displayed visually nearby the housing/mouse cursor.
•The user can view distances by moving the mouse cursor around the environment.
•To finalize the measurement the user releases the left-click.
•To cancel the tape measure the user can either put the tool away or release the left-click at the starting location again.
•Releasing by the starting location unpins the hooked tab, allowing the user to choose another starting location.
•When the user unpins the hooked tab it does not put the tool the away.
VR
• The user pulls the trigger and holds (on the VR controller the tool is connected to) at a starting location, pinning the hooked tab to that location.
•The housing is directly connected to the VR controller holding it.
•The tape measure is displayed between the two points (hooked tab/starting location and housing/VR controller).
•The distance is displayed visually nearby the housing/VR controller.
•The user measures by moving the VR controller/housing around the environment.
•To finalize the measurement the user releases the trigger.
•To cancel the tape measure the user can either put the tool away or releases the trigger at the starting location.
•Releasing the trigger at the starting location unpins the hooked tab, allowing the user to choose another starting location.
•When the user unpins the hooked tab it does not put the tool the away.

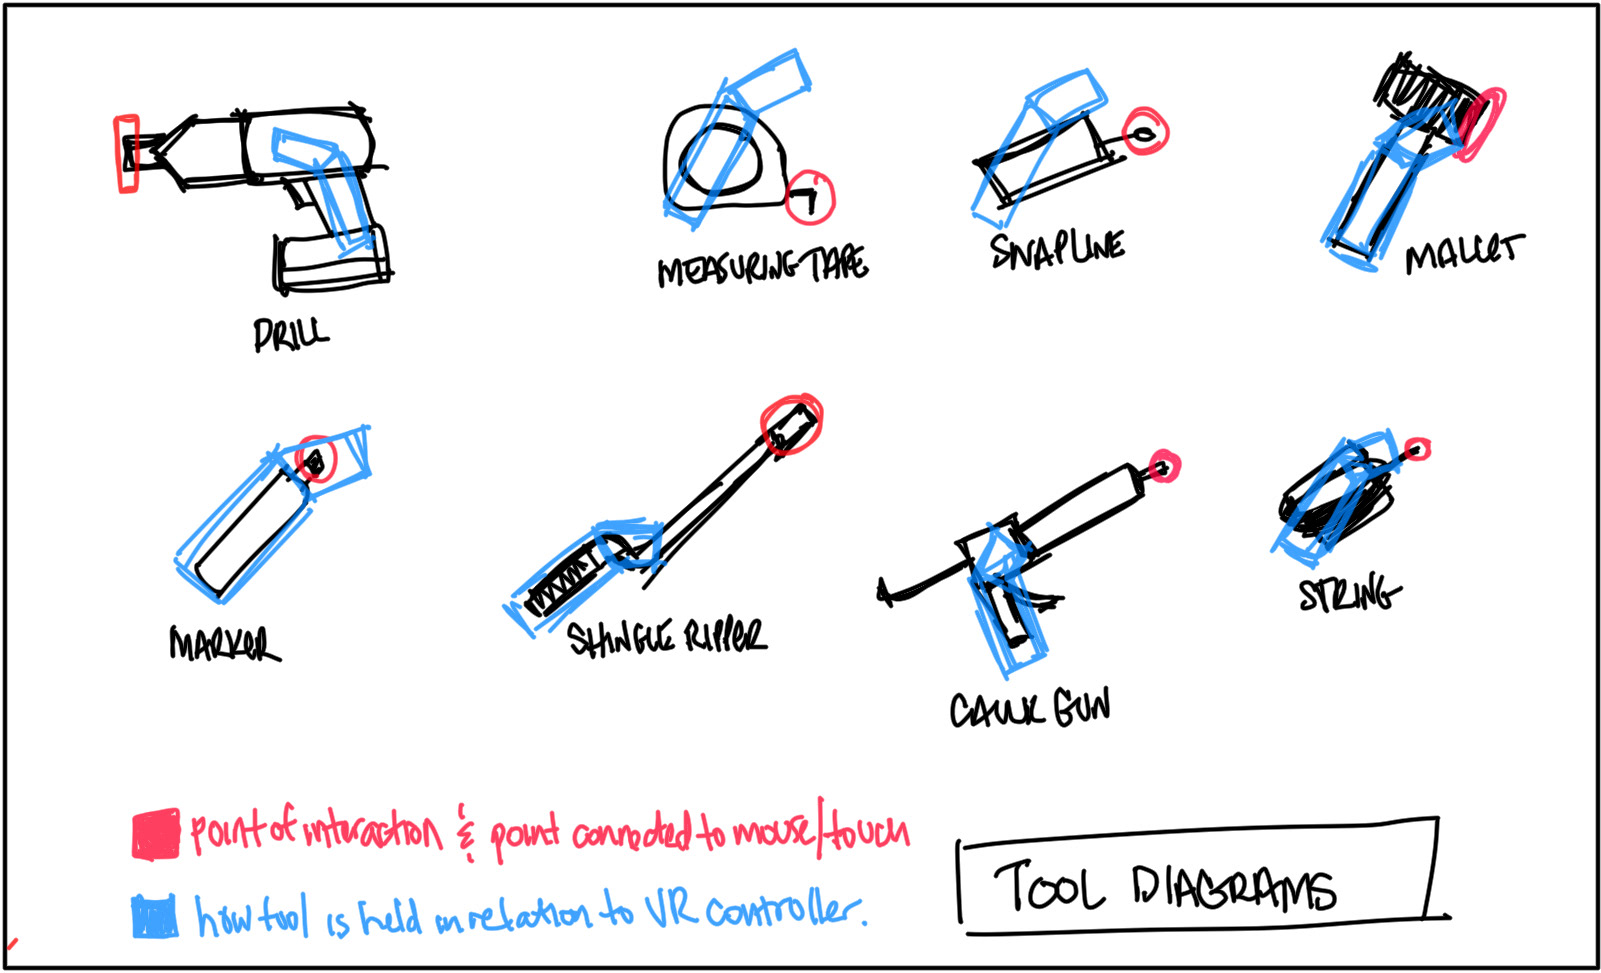
Last bit is a sketch showing the points of interaction and handling for the main/core tools. In this sketch I am showing what part of the tool is considered the 'point of interaction' (in red) and then in blue is how the tools would be aligned with the VR controller (HTC Vive).